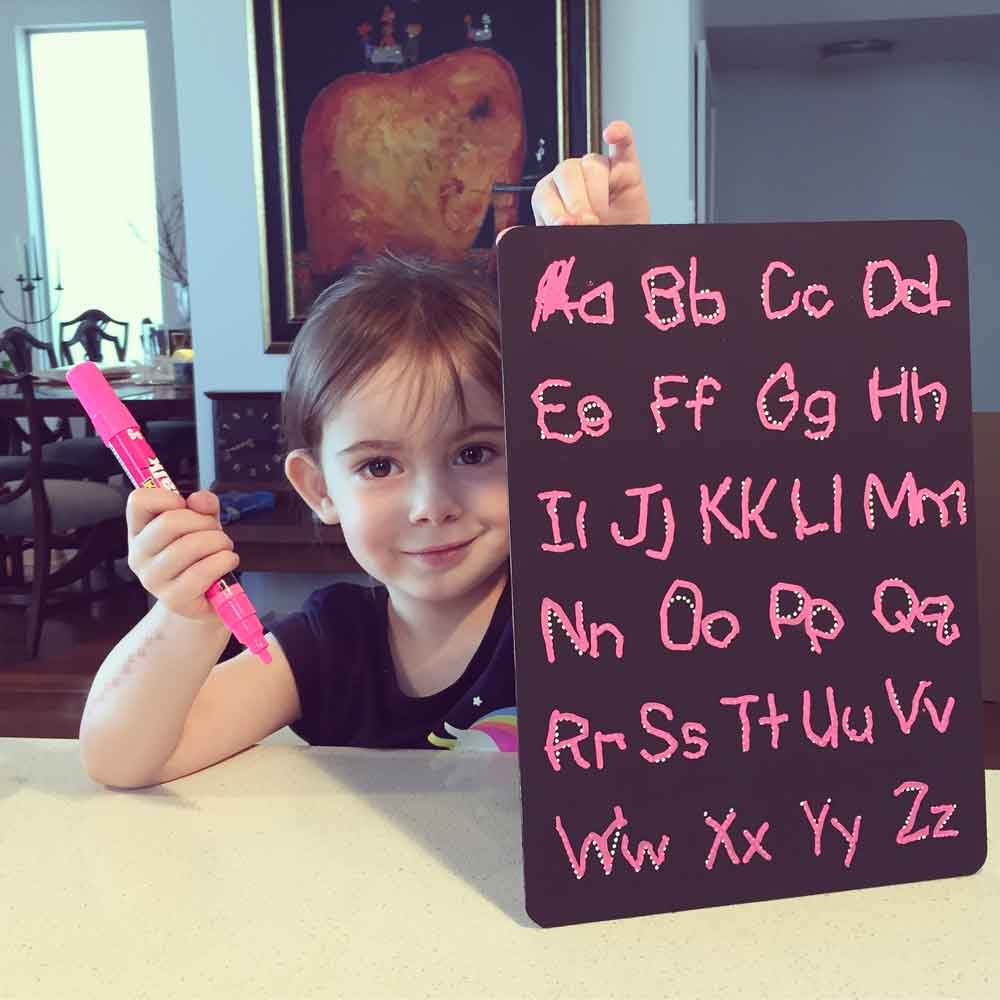
Ready for School Chalkboards
Using the Mini Prep Ready for School Program, you can take the learnings from program and develop your own activities with your mini ones.
We would like to show you some simple tips on how you can create your very own DIY Alphabet, numbers and name chalkboards.
What will you need?
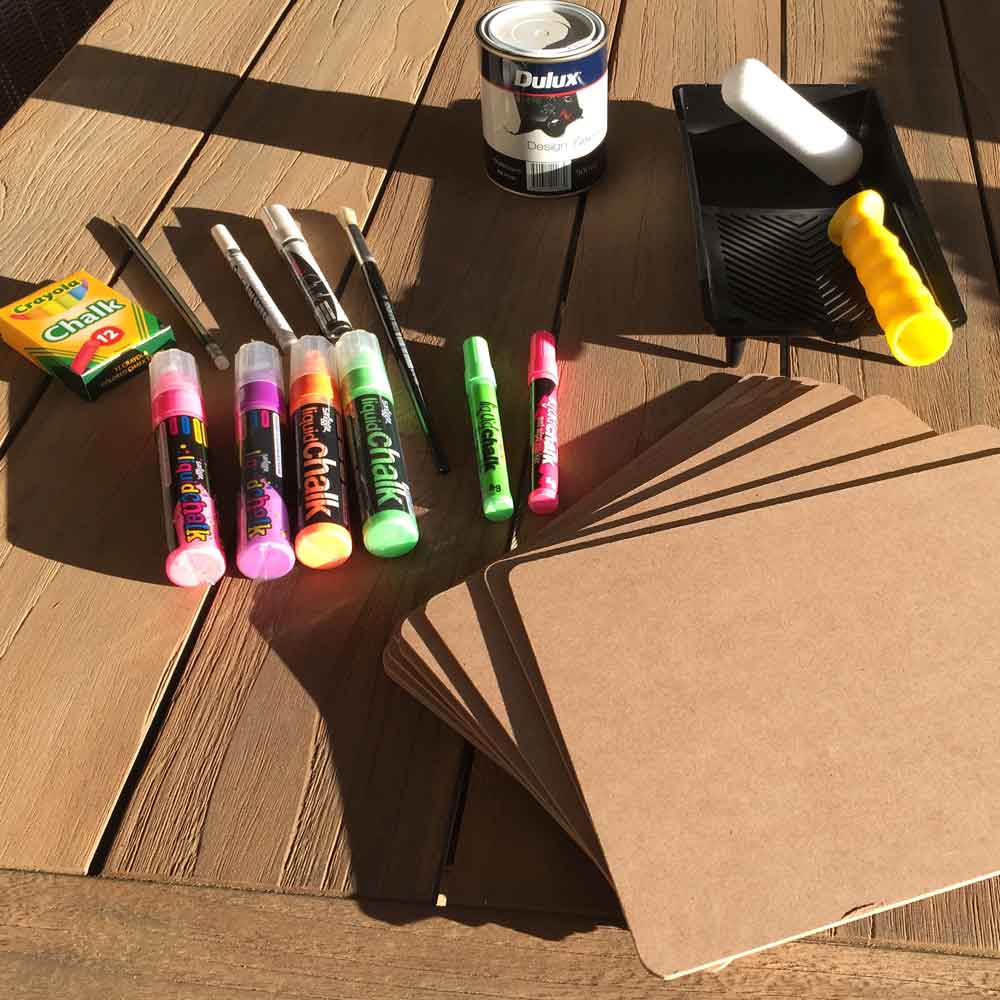
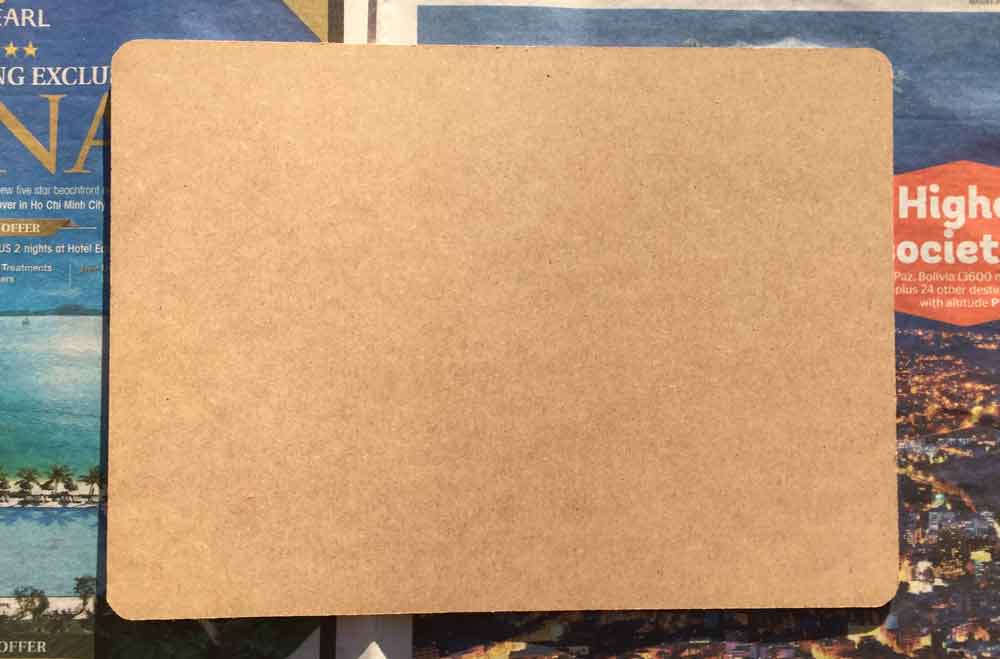
- Craft Boards – The boards used in this post are purchased from bunnings. These are great as they are only $2.55 for a pack of 10! [See product]
- Dulux Chalkboard paint. For these 10 craft boards, we didn’t use more than half the small container (500ml). Dulux also have a great coloured range if you would like to change it up from the typical black chalkboard! [See product]
- Paint Roller and Tray – can be bought from bunnings.
- Chalk
- Permanent white Ink Markers to mark the letters, numbers and the names of your mini ones [see product]
- Liquid Chalk Ink Pens – we used the thin ink chalk pens from eckersleys [see product] as they are easy for the little ones to hold. You can also buy some from Smiggle, however, they are quite large pens to hold. When purchasing these pens, ensure that they are for ‘blackboards’ so that they wipe off.
- Pencil
- Ruler
- A4 paper to print the stencils out
- Newspaper (to place the boards on while painting)
- Paint brush – this is an optional extra, instead of writing over each of the letters with liquid chalk or regular chalk, you can use water and a paintbrush to go over each letter/number.
If you don’t want to paint the chalkboards, you can buy premade ones. The best place to find prepainted chalkboards would be Kmart [see product], they also have a double-sided one with a magnetic whiteboard on the other size.
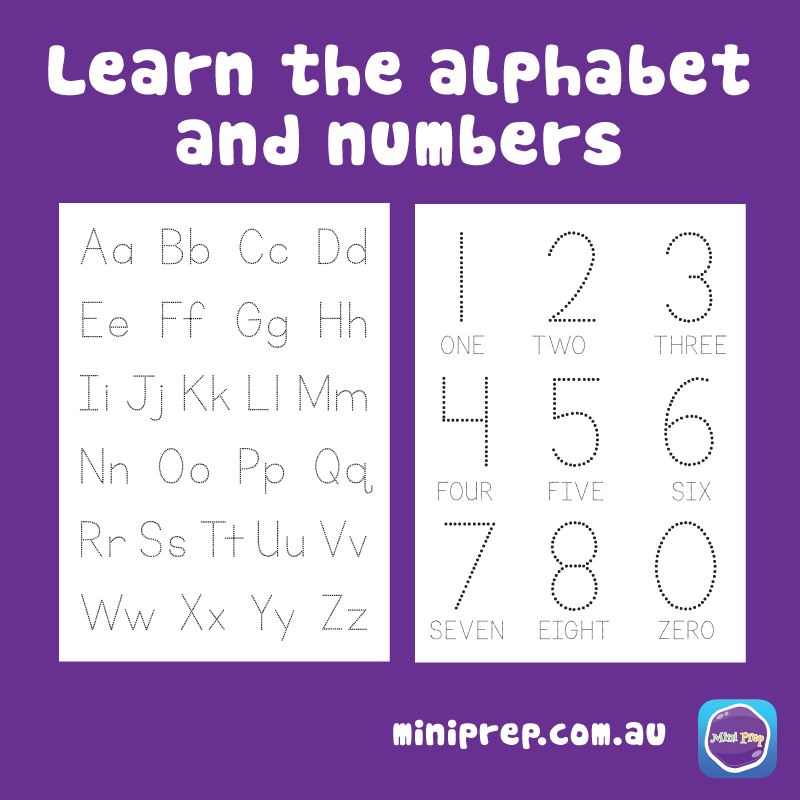
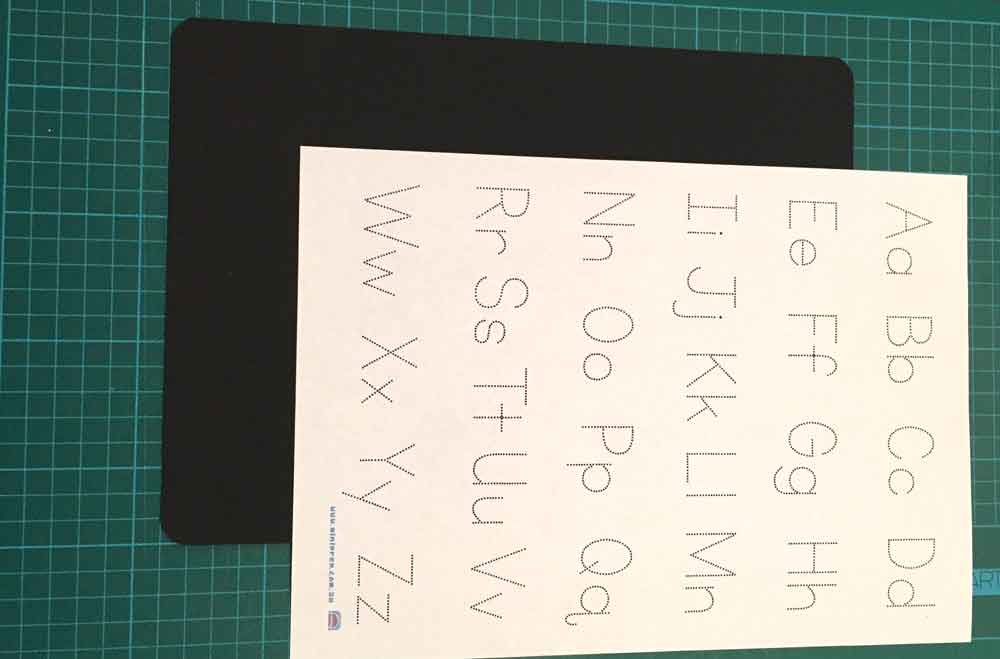
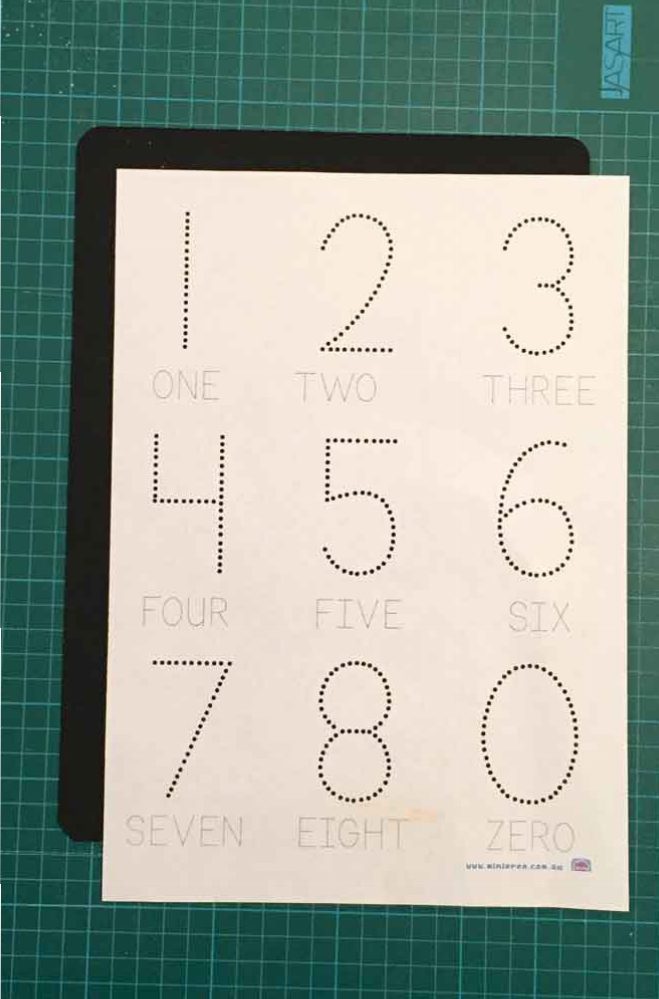
You will also need our premade Mini Prep Stencil [click the image below to download the stencil]
Step 1:
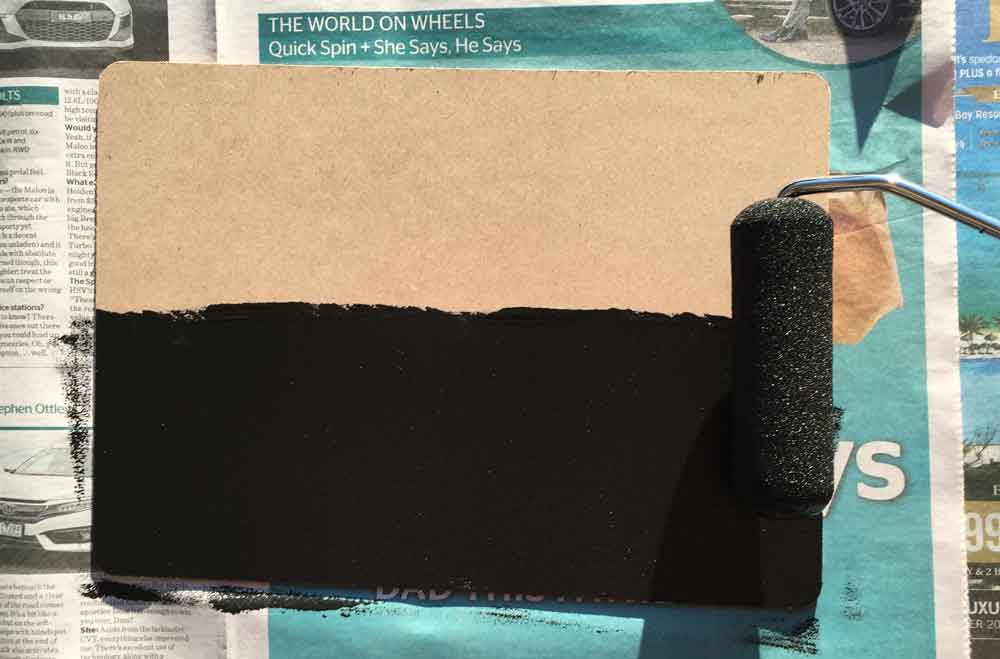
Place the craft boards onto newspaper.
Shake the chalkboard paint and place the desired amount into the rolling paint container.
Roll the roller in the paint to cover and start rolling onto the craft board. For best results, roll in the same direction across the entire board.
You will need to wait for the 1st layer to dry (typically 30min for it to be touch dry). Then coat the board with a second layer of chalkboard paint.
Once the 2nd layer is dry, turn the board over and coat the other side with 2 layers. This is a great way to use both sides, one side you can have the white stencil and the other side you can leave blank for the mini one to draw/write anything they want.
Leave the boards to dry for a few hours (check instructions on the paint container).

Step 2:
Print off the stencil attached. This stencil is an A4 stencil, but you can enlarge it to A3 if you choose to print a larger version.
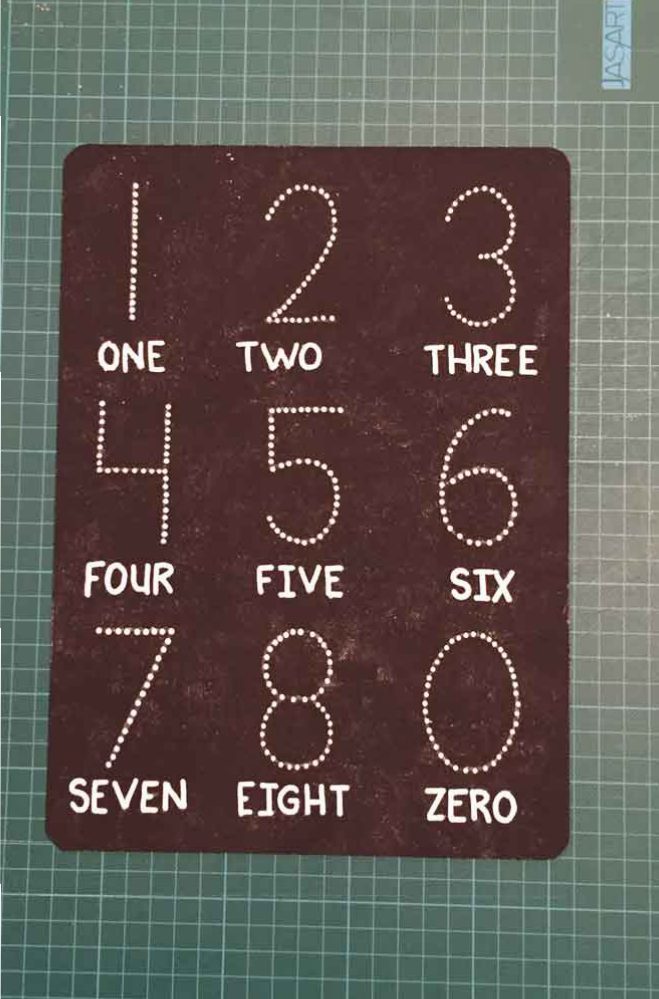
Once the boards are completely dry, we can start writing the letters and numbers on the boards.
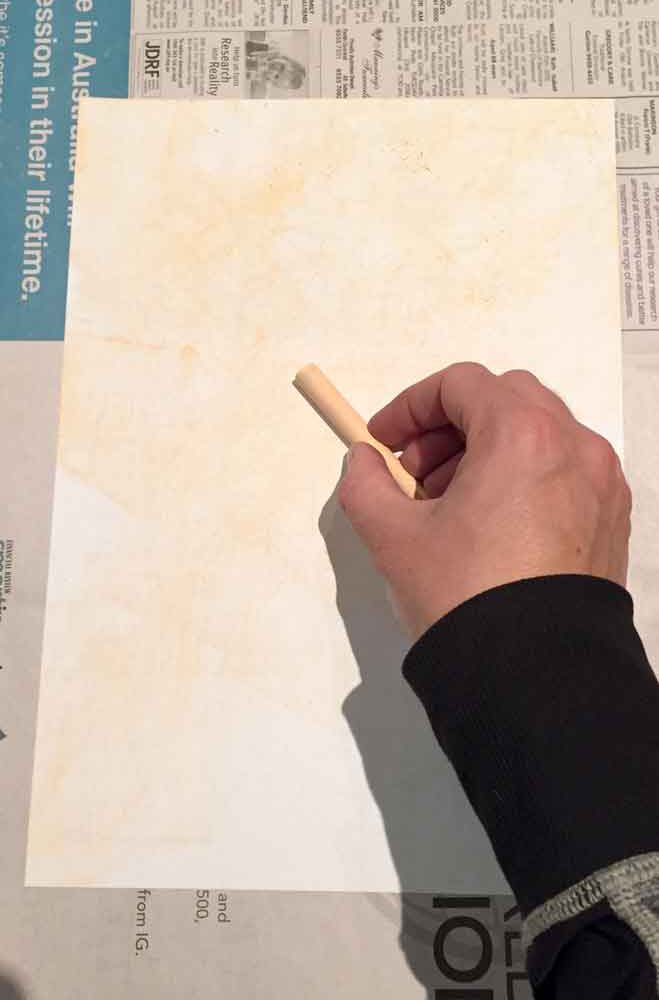
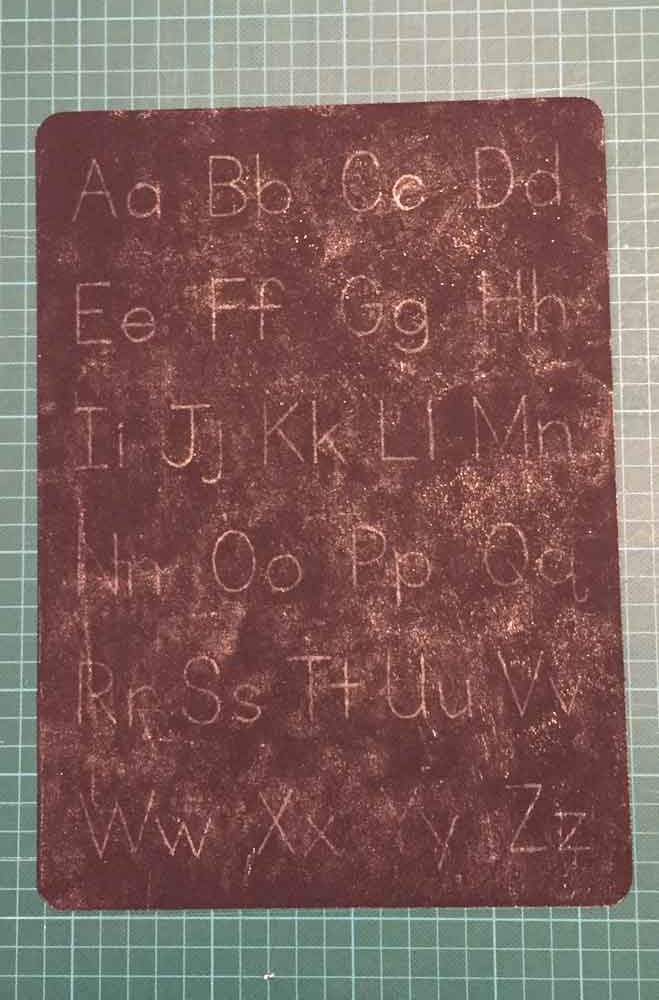
Turn the paper over and cover the paper in regular chalk:

Step 3:
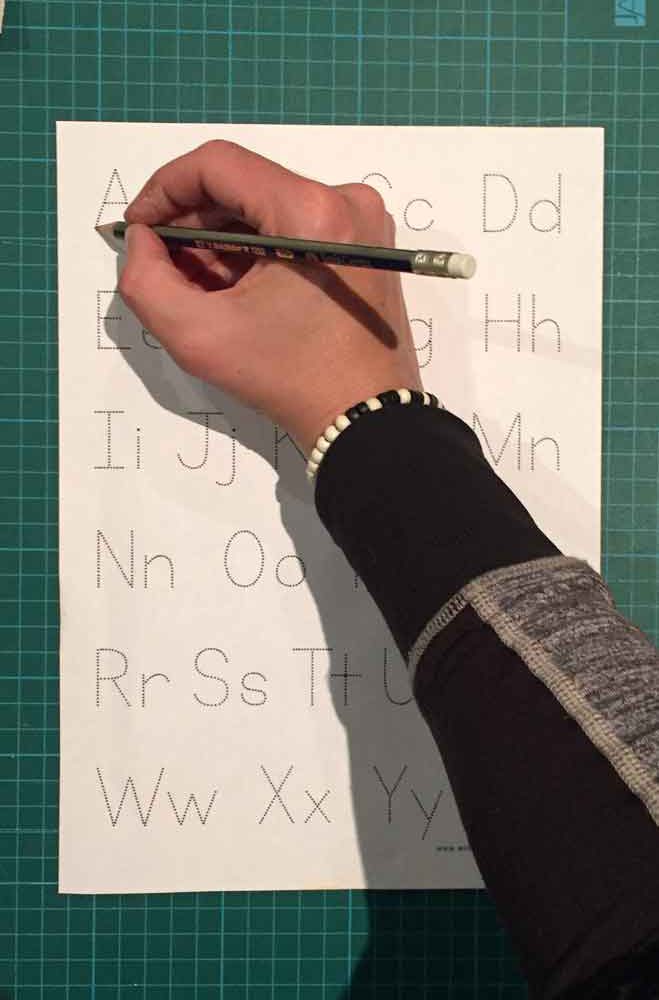
Place the page directly ontop of the chalkboard. Then use a pencil and trace each letter. This will transfer the chalk onto the chalkboard for you to go over in white ink. (If you choose not to do this step, you can simply just hand write the letters or use a letter stencil from office works).
Step 4:
Use a white permanent marker to go over each of the letters and numbers with little dots. We used Uni POSCA PC-3M Poster Marker White from Office Works.
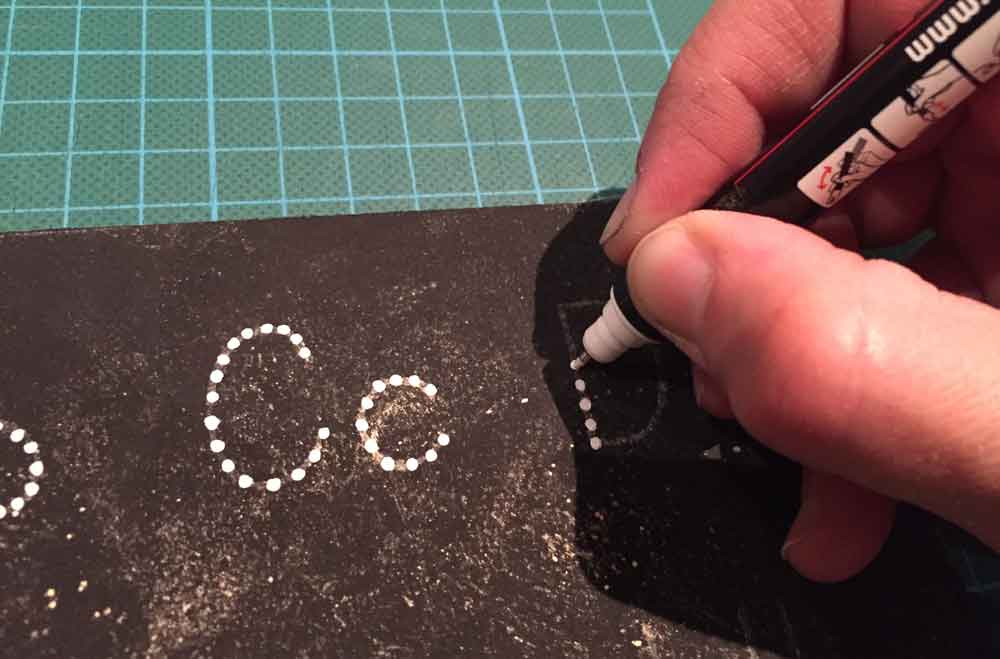
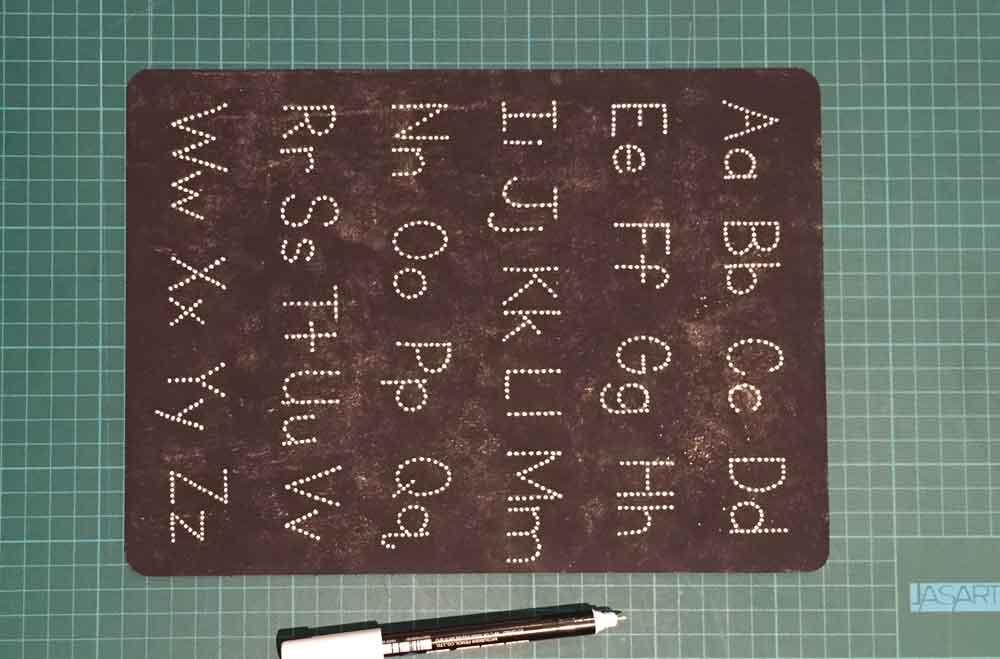
Once you have done this, leave it to dry (dry as long as you can, e.g. overnight). Once completely dry, rince the blackboard under a running tap to wash away any chalk.
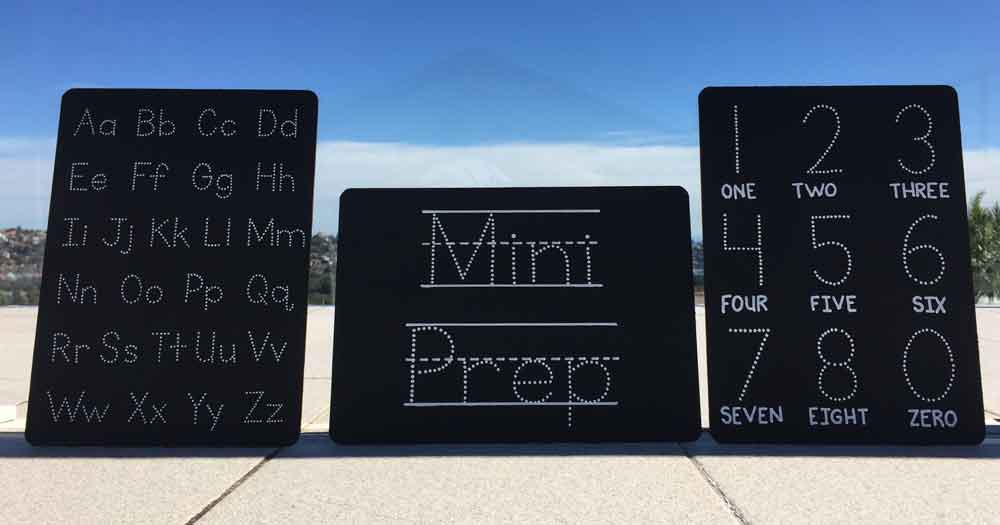
You can repeat these steps to create a number board as well as a board to write your little ones names.
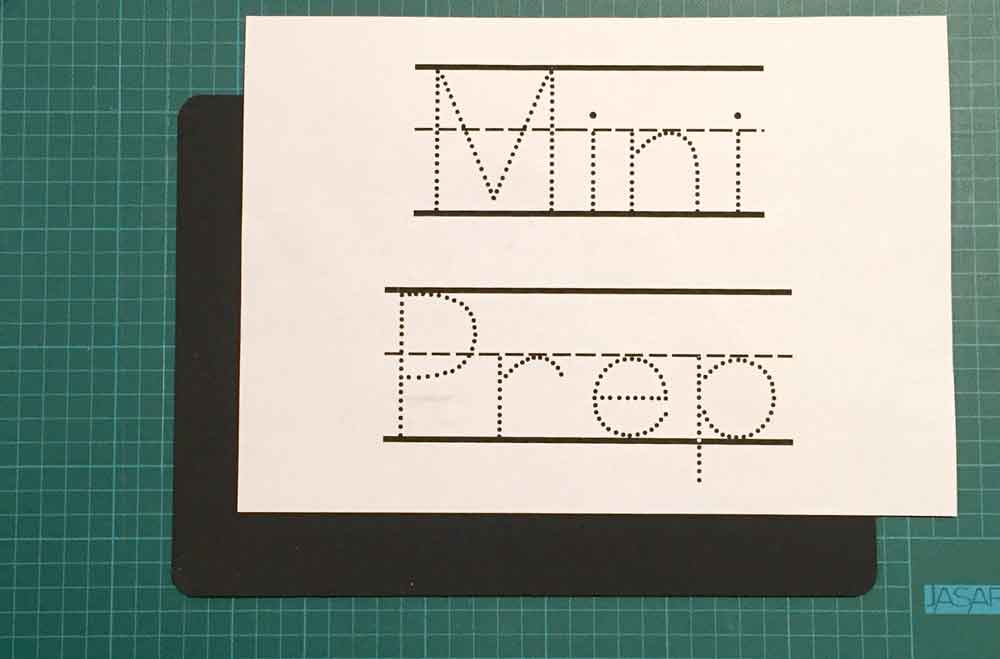
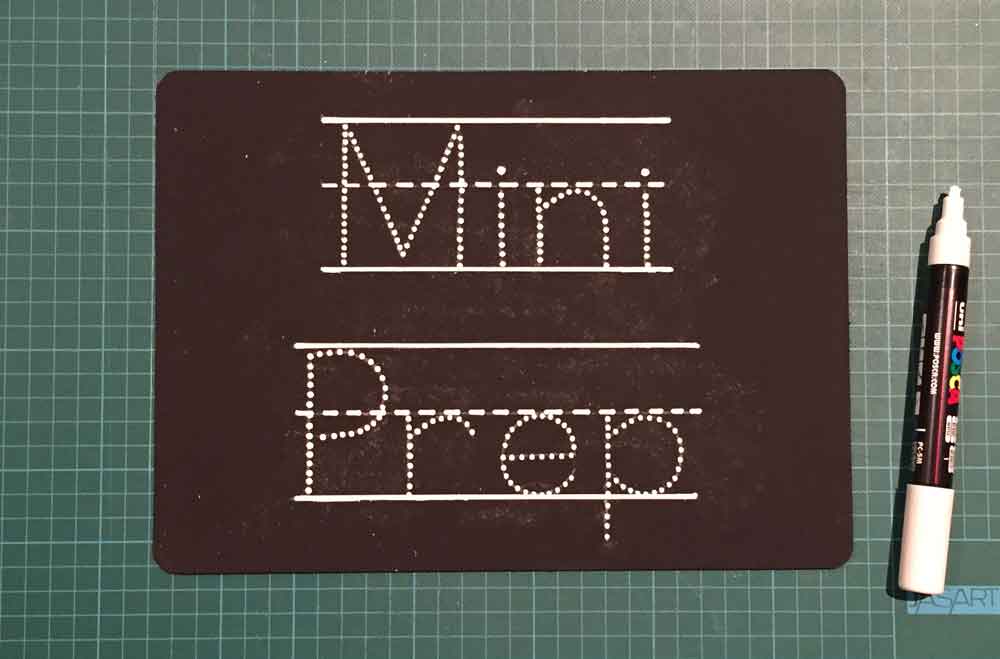
Note, if you would like to use lines in like the above sample for your little ones name. Download the following font: KG Primary Dots.
This font will give you dotted letters with and without the lines.
Please note that if you would like to have templates in the NSW Foundation Font, these will soon be available for downloading. We will update this post once ready with links to the template files.
Step 5:
Last step… have fun!
Use Liquid Chalk ink to go over each of the letters (as listed above for what you need), just ensure it’s for blackboards otherwise it won’t wipe off.
Use standard chalk.
Use a paint brush and paint over each letter and number with water.